To integrate Android & Soft POS terminals from NEXI, you must first upgrade the NEXI Pay application.
The merchant must send a settlement package through the NEXI Pay app to ensure there are no pending transactions before proceeding with the integration..
To issue a WebECR code in the CLOUD, follow these steps:
- Select “Applications”

- Select the FinConnect application and install it. Leave the NEXI Pay app running in the background of the device.

- When the application opens, select “Allow” on the prompt that appears. (Do you allow FinConnect App to access terminal’s readers?)

- Then, you will see the following message. Select “OK” to complete the setup process. (Left Screenshot: “Missing configuration: Define the terminal identifier on the configuration screen.” Button: OK)(Right Screenshot: Payment Router Configuration Terminal ID: (should write your Terminals ID), POS Processing Unit: NEXI PAX POS ECR, Device Unit: AADE Interface ECR, Button: Update Configuration)

- From the FinConnect app menu, go to Operations → WebECR Code to receive the 8-character code (consisting of letters and digits).
This code is active for 15 minutes. - The ERP system consumes the code to establish the connection.
The above instructions were provided by NEXI.
To integrate the terminal with the API of the provider SBZ IKE, proceed with the following steps:
-
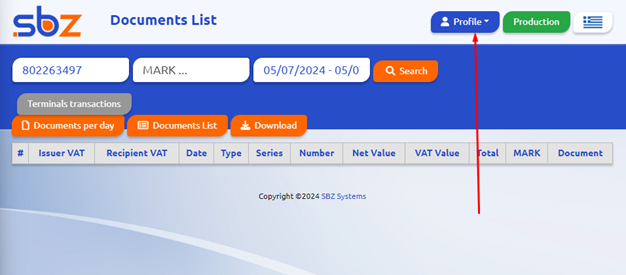
- Firstly, we log in at api.sbz.gr.

- We press at “Profile” and choose “Settings”.

- You will notice the “Payment Terminals” field.

- We continue by following the instructions by MELLON to export the Authorization password from our POS.
INSTRUCTIONS⬅️ - After exporting the 8-digit Authorization password from our POS, we go to api.sbz.gr and insert the AUTHORIZATION password. (inserting the POS password should be done quite rapidly because of the time limit the POS terminal devices have)

- Furthermore, you need to choose the company of your POS in the dropdown at the right.
- In the field SOURCE, you need to set a name for your POS, i.e.. Card.
- We press Add/Edit.
- The message SUCCESS should appear.
- After upgrading EMDI the following field will appear in Settings.

- Choosing the Payment Terminals field, you will need to ✔️ the WebECR option. In the «Source Name» you should write down the name of your POS the exact same way you did in the API i.e. Card.

- Next, we go to “Payment Methods” and create a payment method, e.g., Card POS NEXI. We set it as paid and configure it to be in order -1
- We save, close, and reopen the settings.
- We go to “Payment Methods” and for the payment method CASH, we add the previously created method, i.e., Card POS NEXI, as an additional payment method.

- We proceed to Tax Connections, in Matching Variables. For the payment method we just created, we select POS in the “MyData Payment Method” field.

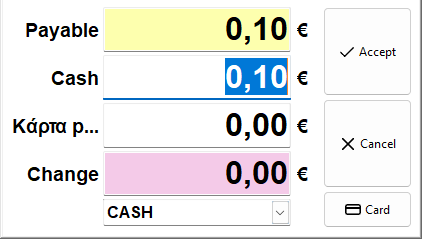
- Finally, we proceed to Purchases/Sales🔴, and create a test Retail Receipt with the product name POS TEST for 0.10 cents. The payment method CASH should already be pre-selected so that the following window appears during the entry.

- Here, you can split the payment if the customer requests, for example, half with a card and the rest with cash.
- Whether the payment is split or not, if it is with a card, we press the 💳Card button.
- A window will appear asking for either an installment or a tip. (you can ignore it if you do not want to proceed)
- We select the card we created, Card POS NEXI, and by pressing the green button on our POS terminal, the payment is sent.
- We also make a return receipt to return the money to the card through the POS terminal.
- If everything works correctly, we need to check on api.sbz.gr to see if there is the 💳 icon on the documents paid with a card.


