Install Hyper-V Manager Feature – Win10 x64
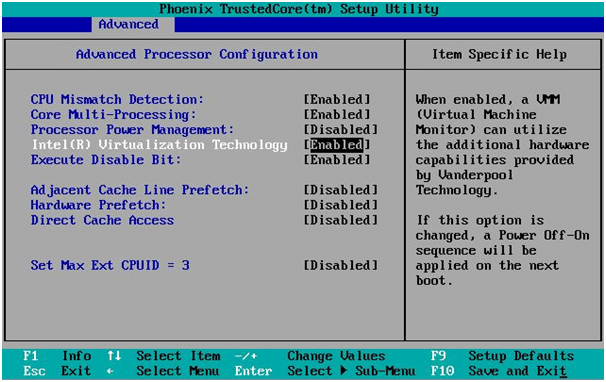
Επιβεβαιώστε ότι έχετε το Intel Virtualization Technology ενεργοποιημένο για το σύστημα που χρησιμοποιείτε μέσω των BIOS / Firmware ρυθμίσεων. Κάθε κατασκευαστής έχει διαφορετικές ρυθμίσεις BIOS οπότε από κάτω είναι ένα παράδειγμα.
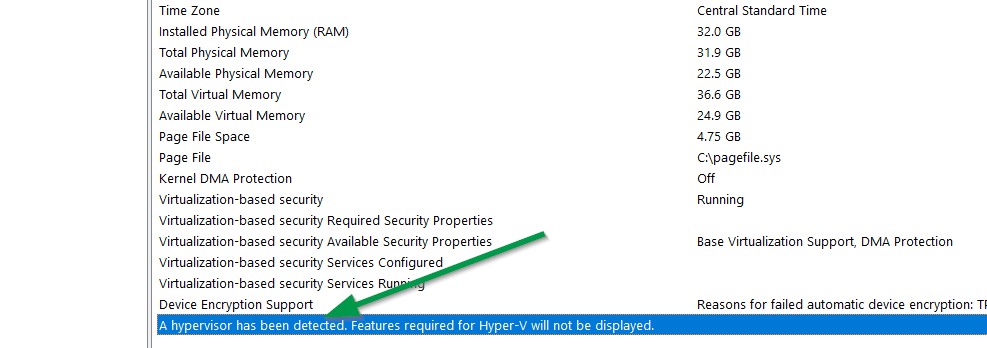
Επιβεβαιώστε ότι το λειτουργικό των Windows 10 δείχνει ότι αναγνωρίζει ένα hypervisor, ενεργοποιημένο στα BIOS/firmware και ενεργοποιήστε το Hyper-V στα προγράμματα & λειτουργίες.
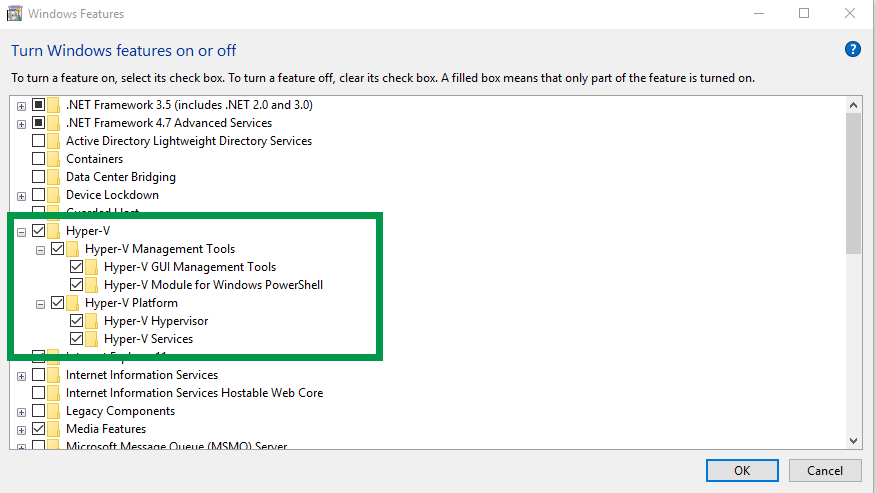
Στο σύστημα του οικοδεσπότη εγκαταστήστε το Hyper-V κάνοντας δεξί κλικ στο windows 10 start menu, επιλέξτε “Apps & Features” > “Programs and Features”, ενεργοποιήστε το Hyper-V και το Hyper-V Platform όπως φαίνεται εδώ. Έπειτα κάντε επανεκκίνηση.
Εγκατάσταση Hyper-V Guest Virtual machine και ρυθμίσεις
Κατεβάστε το Windows Server 2019 ISO media file, αφού θα χρησιμοποιηθεί με τις ρυθμίσεις του Hyper-V στη virtual machine του guest.
Τρέξτε το Hyper-V Manager, δημιουργήστε καινούργιο guest VM και ρυθμίστε τα ακόλουθα.
- Ενεργοποιήστε το Generation 2 guest VM κατά τη δημιουργία του VM
- Ενεργοποιήστε 2 εικονικούς επεξεργαστές
- Κατανέμετε 4GB RAM
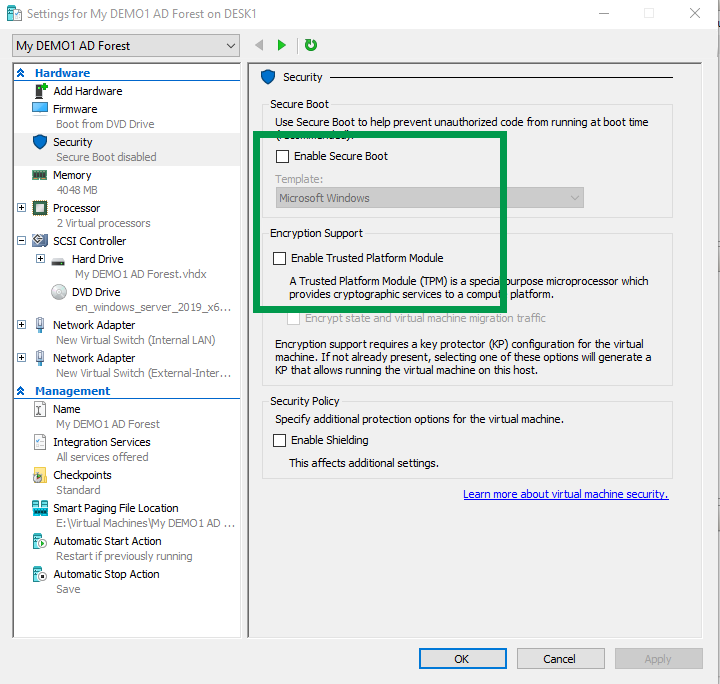
- Απενεργοποιείτε το TPM και το Secure Boot
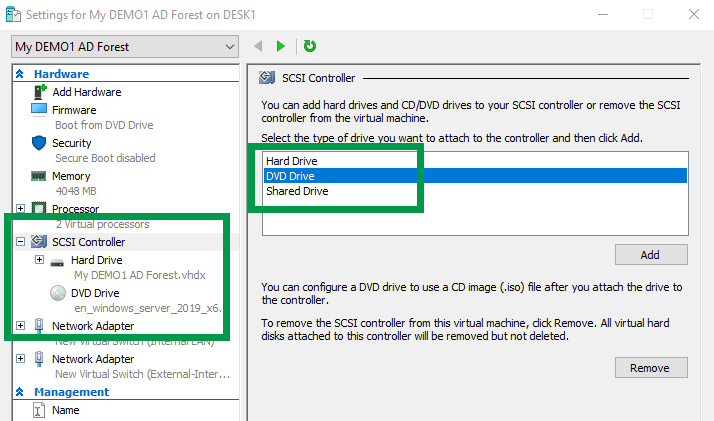
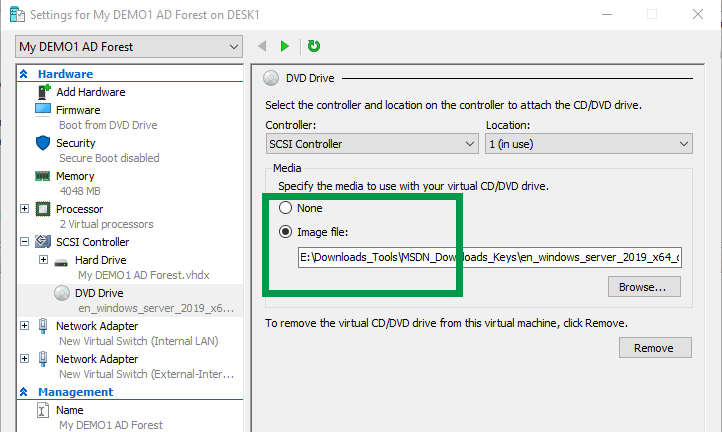
- προσθέτετε το DVD Drive
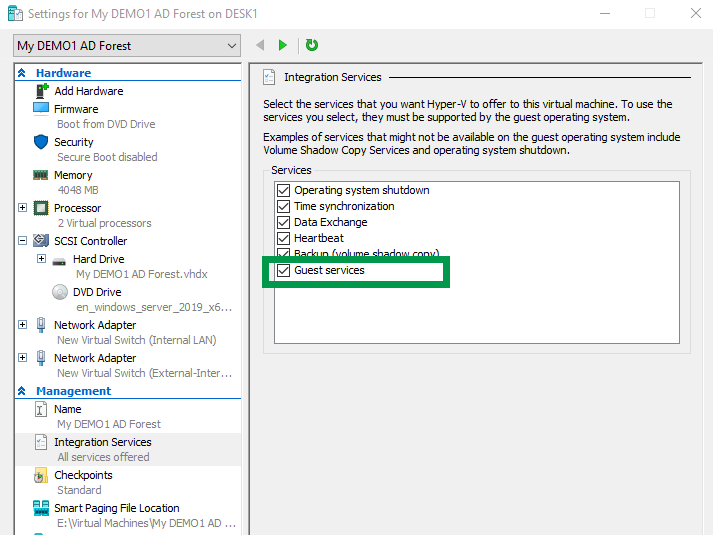
- Ενεργοποιείτε τα Guest Services
Εγκατάσταση του Windows Server 2019 OS
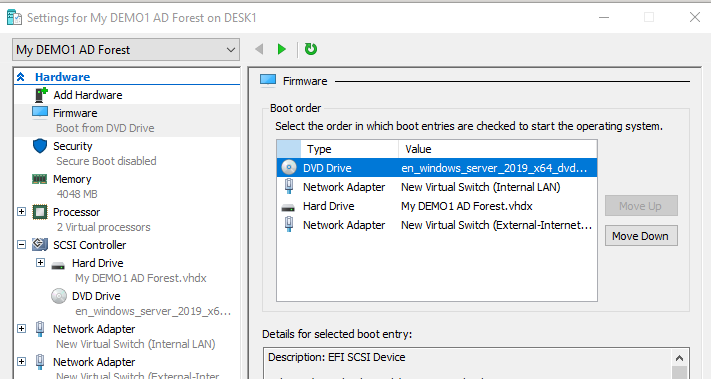
Από τον Hype-V Manager στα Windows 10, σιγουρευτείτε πως το DVD είναι το πρώτο boot devices και ότι το ISO image file έχει ρυθμιστεί σωστά.
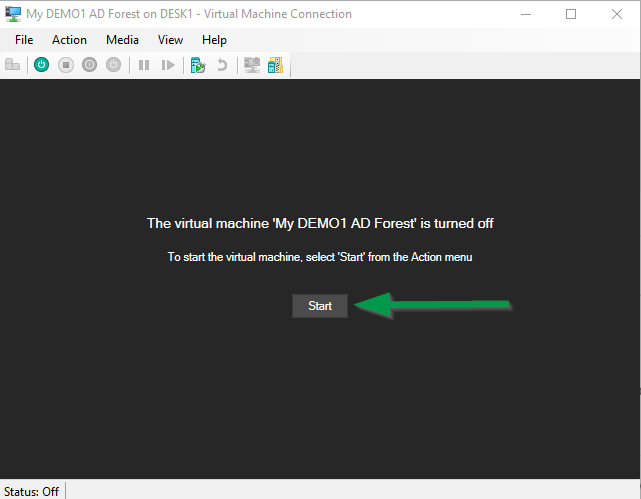
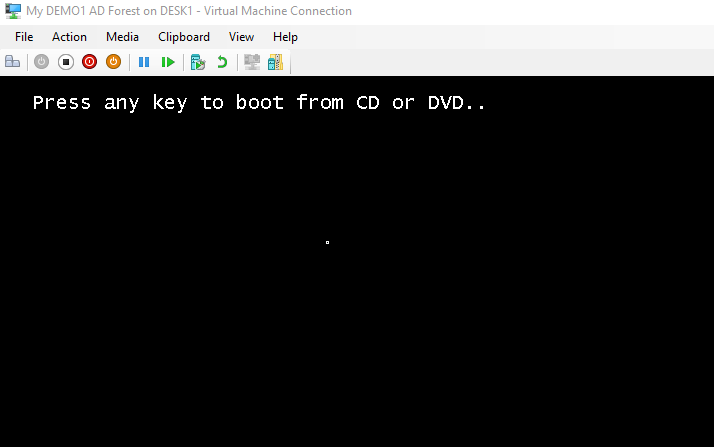
Συνδεθείτε στη νέα VM και σύντομα πατήστε ένα κουμπί για να κάνετε boot στο ISO του Windows Server 2019. Πατάτε “Start“.
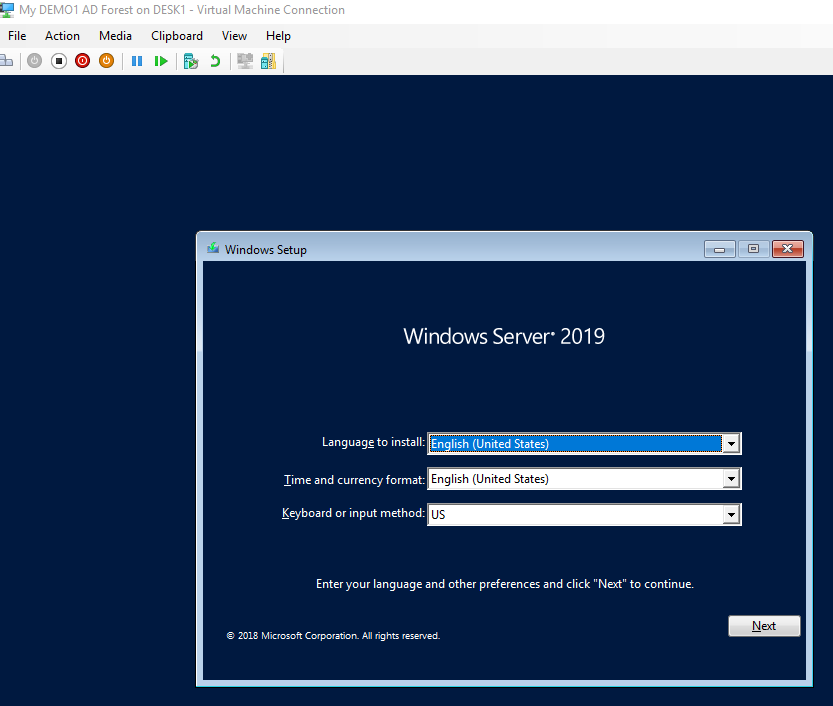
Επιλέγετε γλώσσα, προσπερνάτε ή προσθέτετε ένα product key, επιλέγετε “Windows Server 2019 Standard (Desktop Experience)”, κάνετε φορμάτ το τμήμα το δίσκου και ξεκινάει η εγκατάσταση του OS.
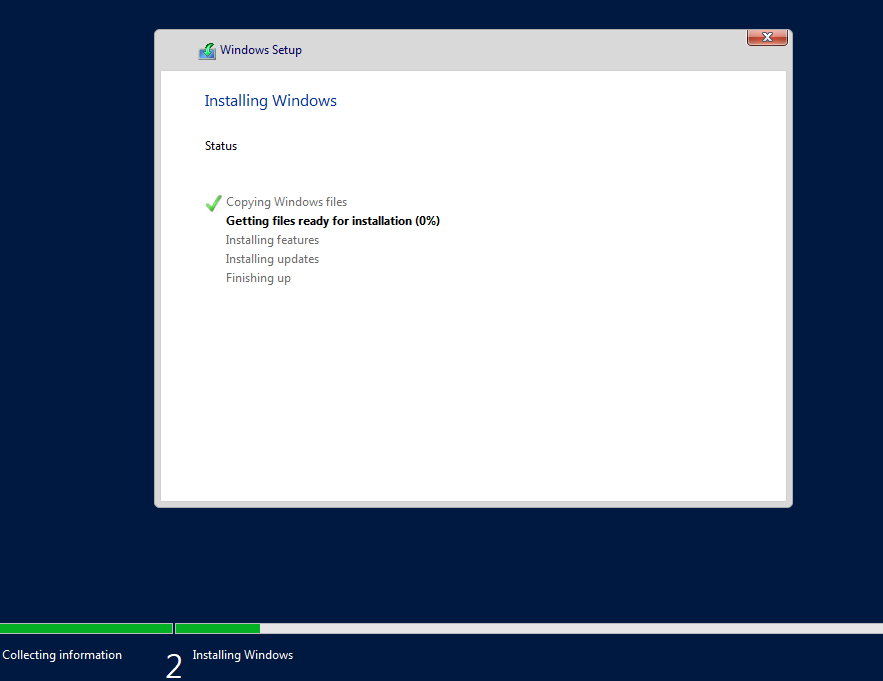
Enter the initial administrator password and the installation of Windows Server will be complete. Move on to the next steps to rename the computer, install updates, activate Windows, set the timezone and set a static IP address on the internal VM network card.
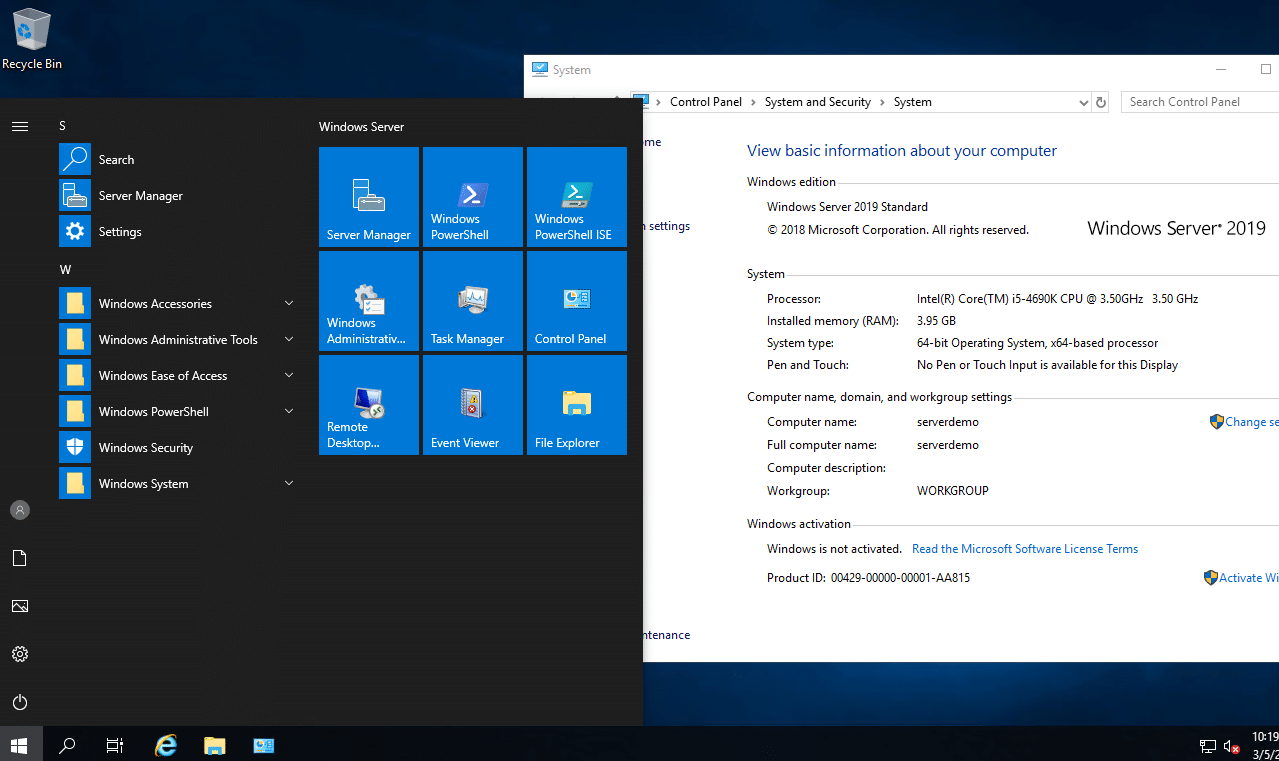
Configure Windows Server 2019 (Post OS Install)
Perform the following tasks on the newly installed Windows Server 2019 OS and reboot the server.
- Rename the Server
- Set the Time Zone to your applicable Time Zone
- Set a static IP Address on the TCP/IP V4 the INTERNAL Virtual Machine network card OS settings
- Install Windows Server 2019 Updates
IMPORTANT NOTE: Be sure to set a STATIC IP address on the VM’s internal LAN NIC before you run the Active Directory Services install and configuration wizard. Active Directory, DHCP and DNS require a static IP address. The Active Directory and DHCP installation wizards will display errors if you don’t set a static IP address on the virtual machine internal network card for IPv4.
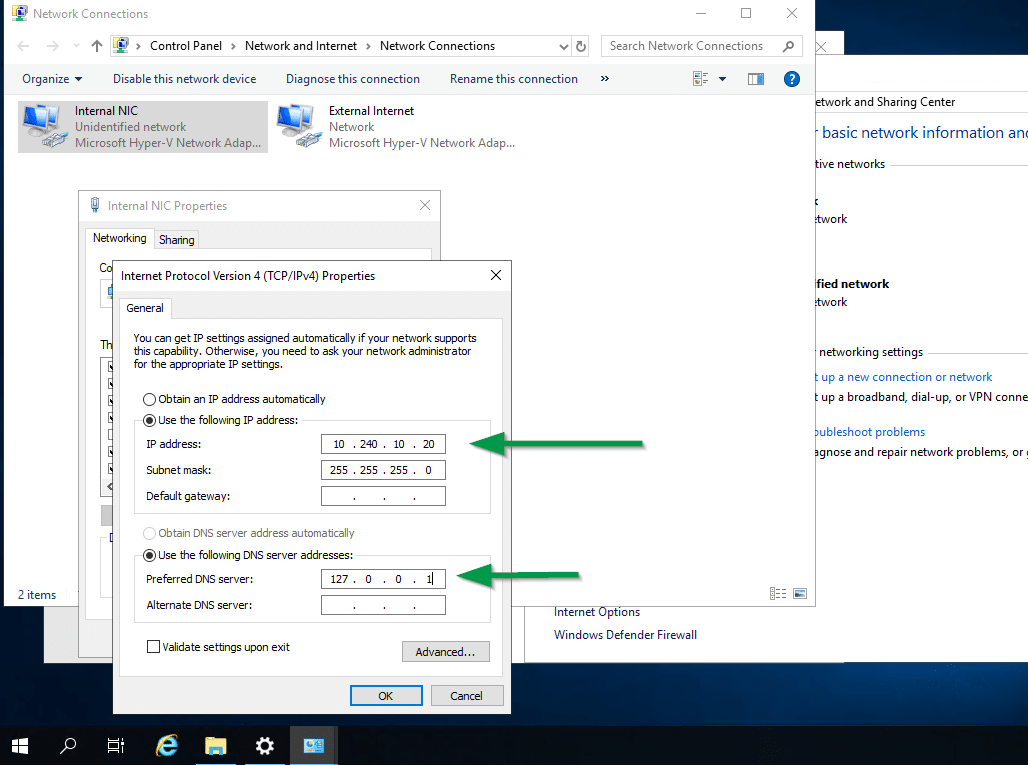
Set a static IP address for the TCP/IPv4 virtual machine INTERNAL NIC as shown here in the example below. Use your own private IP address subnet range. use a 10.x.x.x or 172.16.x.x or 192.168.x.x IP range. For more details about Private Networks review the article here.
CRITICAL NOTE: Be sure to set the IP address for the preferred DNS server to 127.0.0.1 as shown below since we will be using the local server for DNS and Active Directory use.
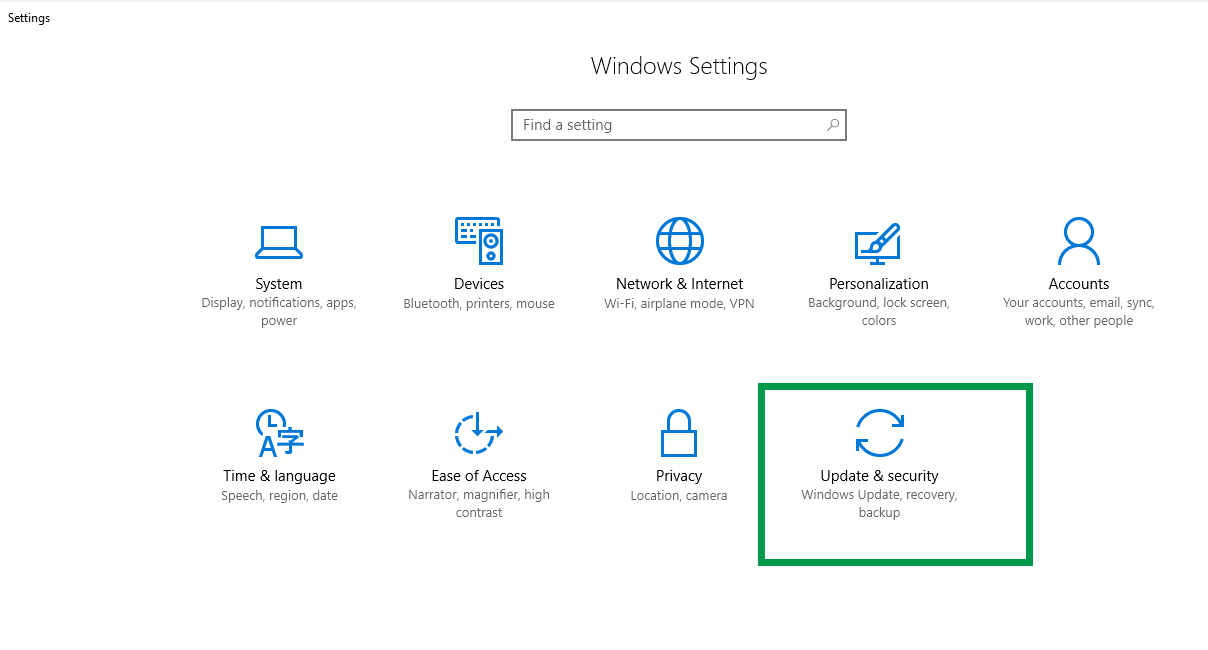
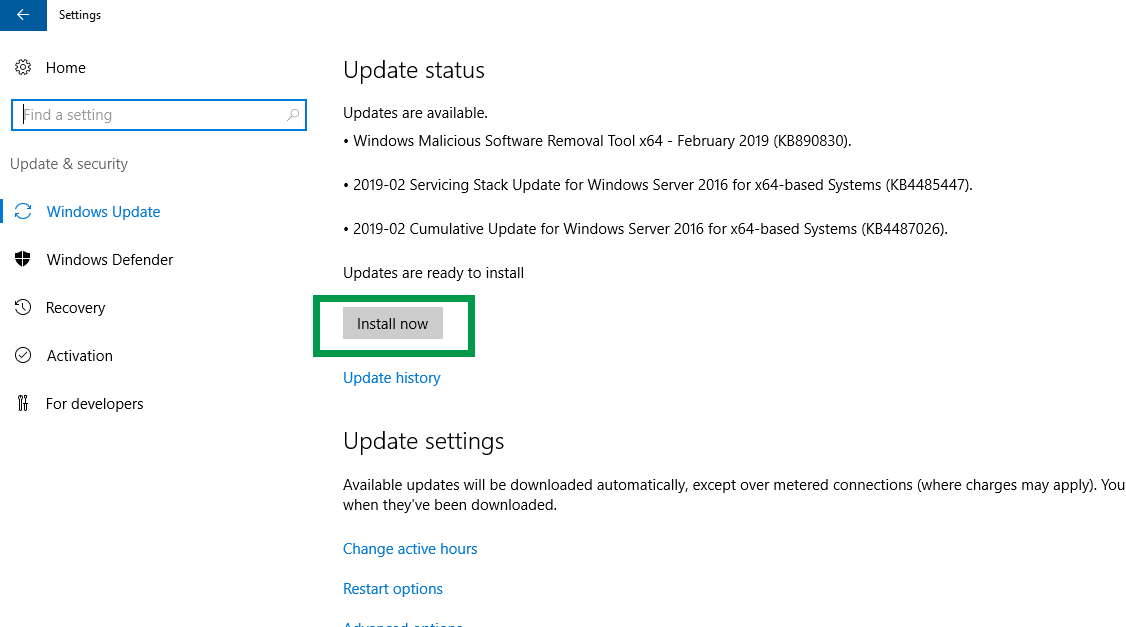
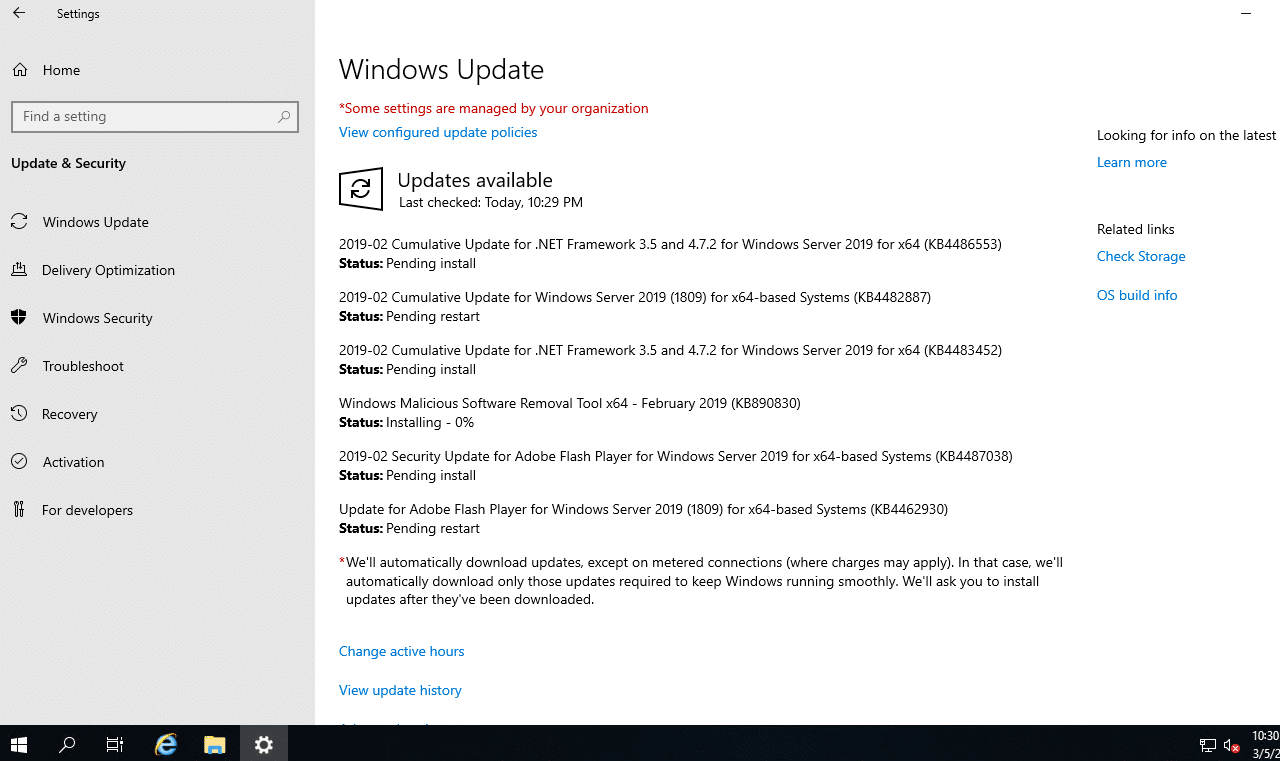
Install the latest Windows Server 2019 updates from the Start Menu > Settings > Update & Security settings applet and reboot as applicable.
Install Active Directory Services, DHCP and DNS Roles
Perform the following steps to install Active Directory Services for a new forest, DNS and DHCP server on the virtual machine.
Prerequisites
- DISABLE the External NIC on the virtual machine if you configured a 2nd NIC for internet access as part of the Windows Server updates and license activation.
Launch “Server Manager” from the start menu and select “Add Roles and Features“.
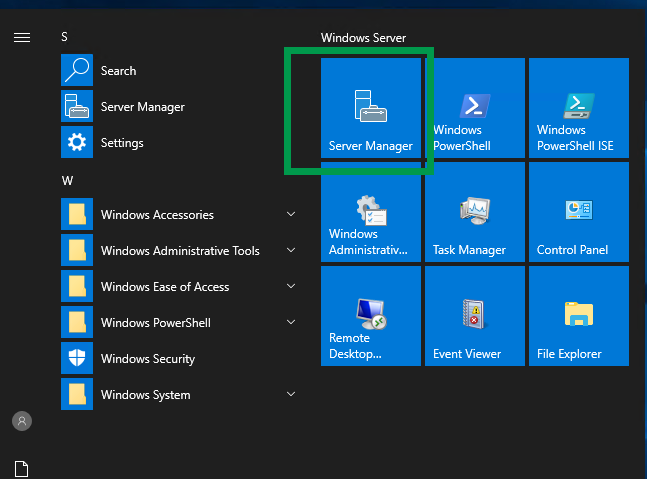
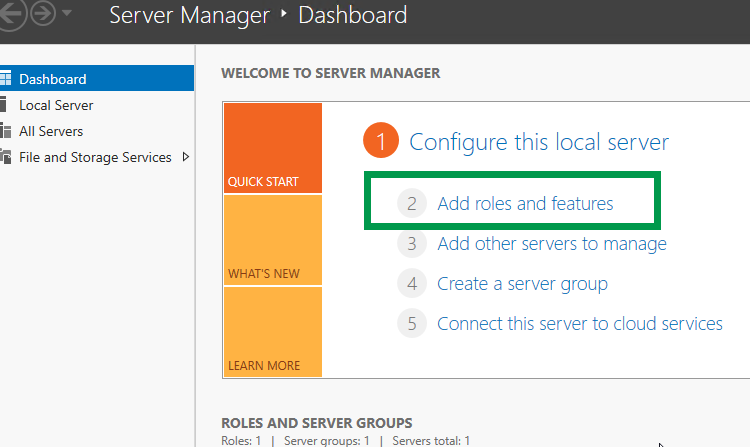
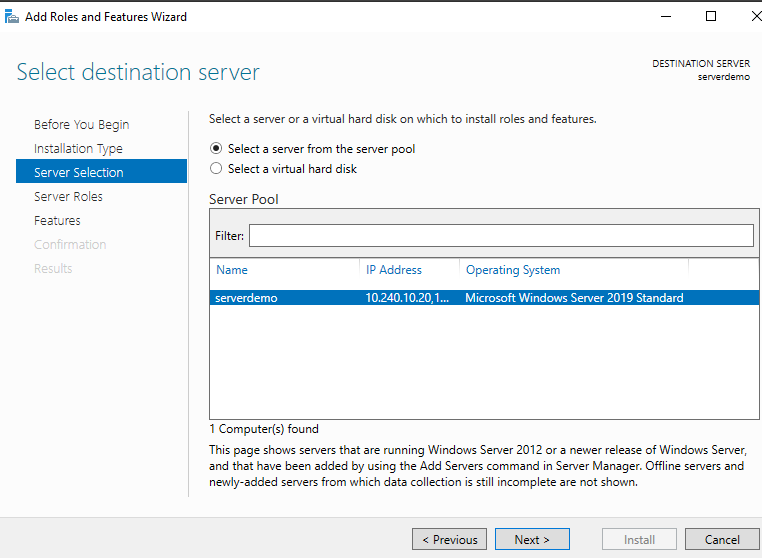
Click Next at the “Before You Begin” screen, and “Next” at the “Select installation type” screen. Be sure the installation type is set to the default “Role-based or feature-based installation“.
At the “Select destination server” click Next to select your local server.
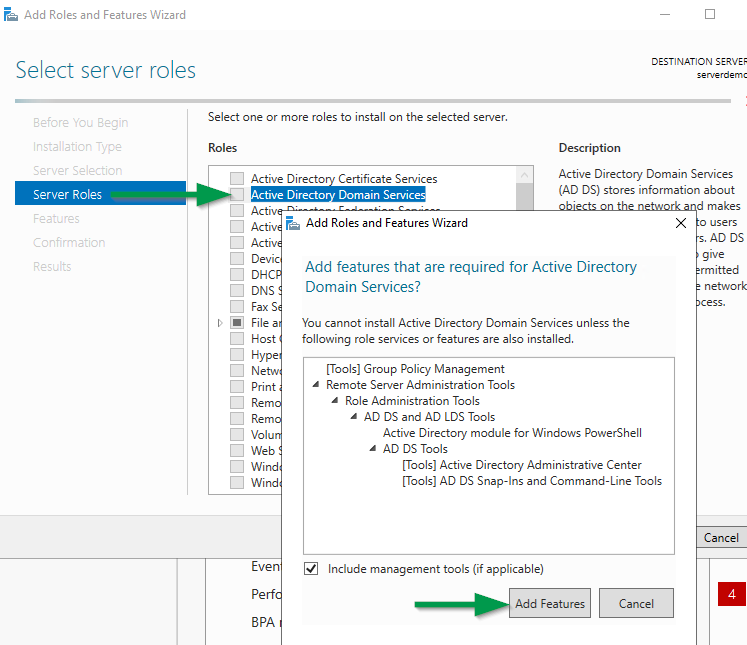
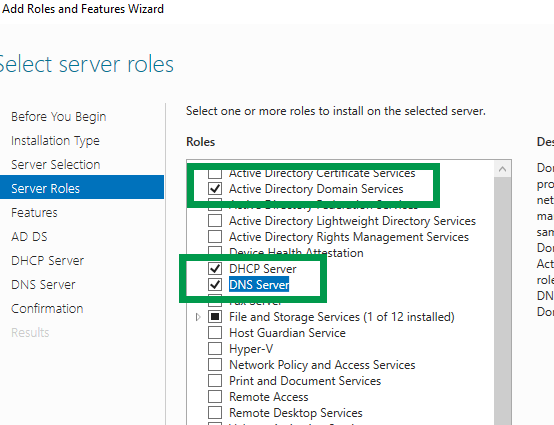
At the “Server Roles” screen be sure to select “Active Directory Domain Services“, “DHCP“, and “DNS“. Select “Add Features” for each one and click Next.
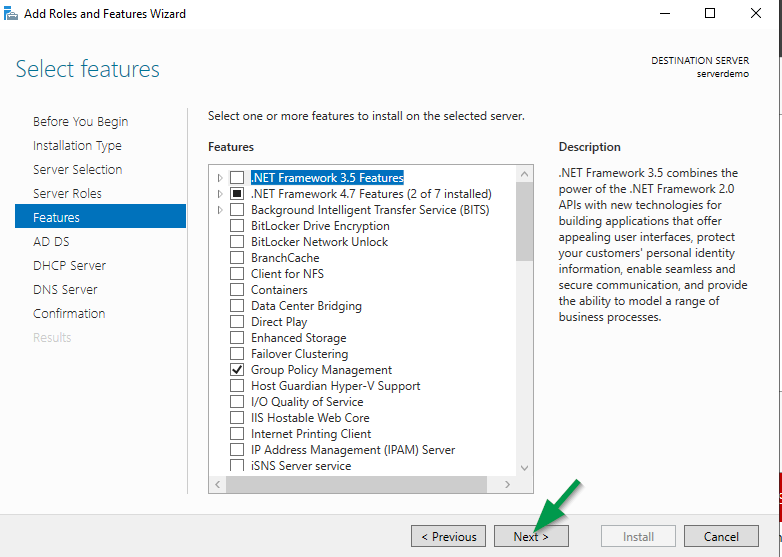
Click Next at the “Select Features” screen.
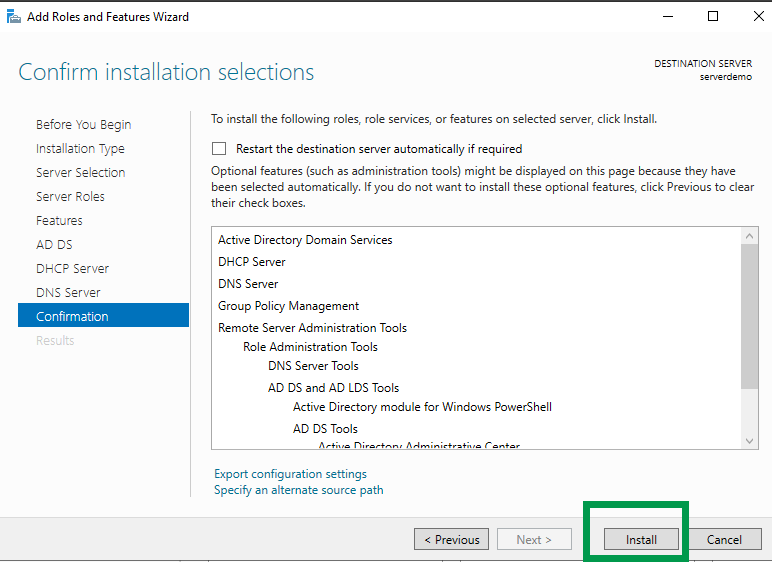
Click Next through the “Active Directory Domain Services“, “DHCP Server” and “DNS Server” screens. Click “Install” to confirm and begin the roles install.
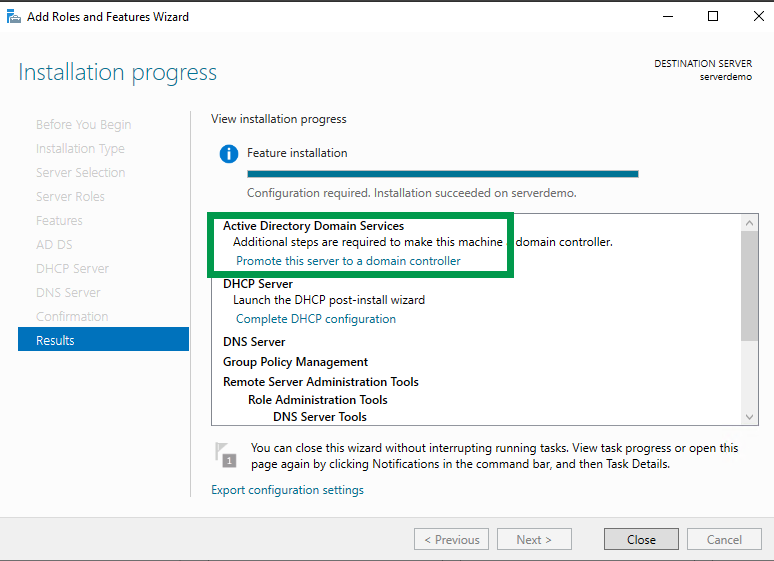
Once the role features installation begins, do not close the Window. We will select the “Promote this server to a domain controller” step in a few minutes.
Promote Server to a Domain Controller
While still on the “Add Roles” wizard, select “Promote this server to a domain controller” option.
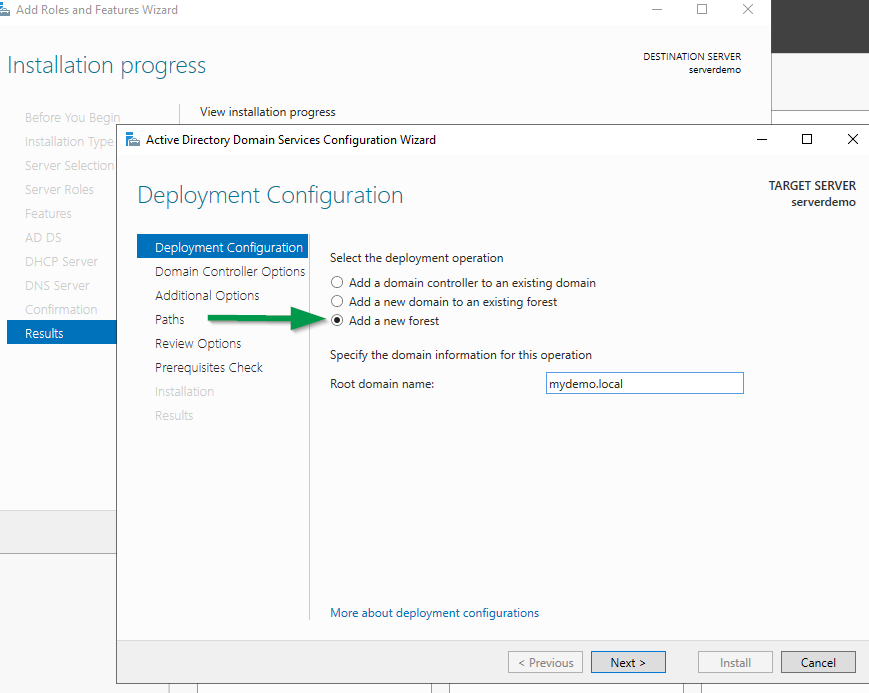
Select the “Add a new forest” radio button, specify a non-routable DNS domain name using the example below such as 1234.local or xxx.local. Review this article here for more details about .local DNS domains.
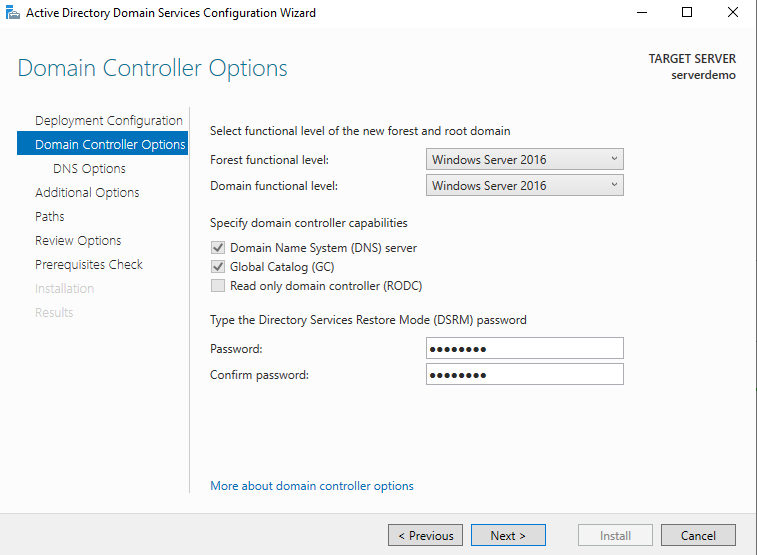
At the “Domain Controllers Options” screen leave the Forest and Domain Functional levels to the default “Windows Server 2016“. In addition, leave the Domain Name System (DNS) server and Global Catalog (GC) options checked, and enter an administrator for the Directory Services Restore Mode (DSRM) password. Click Next.
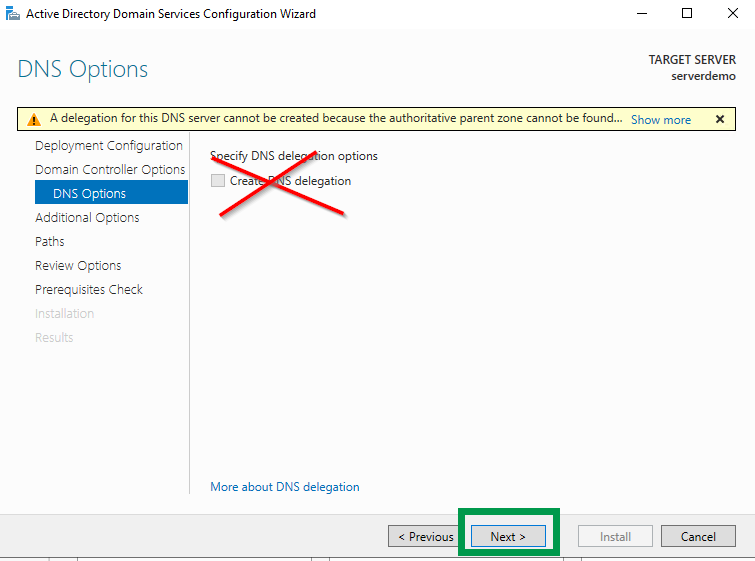
Click Next at the DNS Options screen and DO NOT check the box to create a DNS delegation.
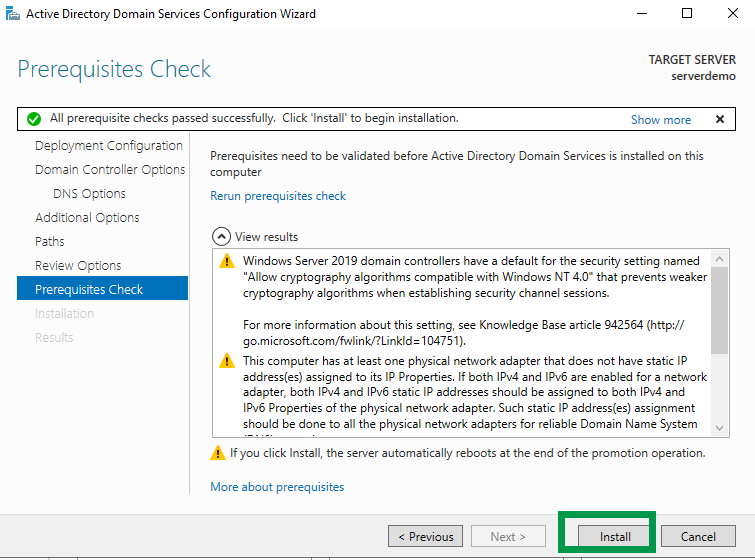
Click Next at the Additional Options, Paths, Review Options, and Prerequisites Check screens. Click “Install” to continue.
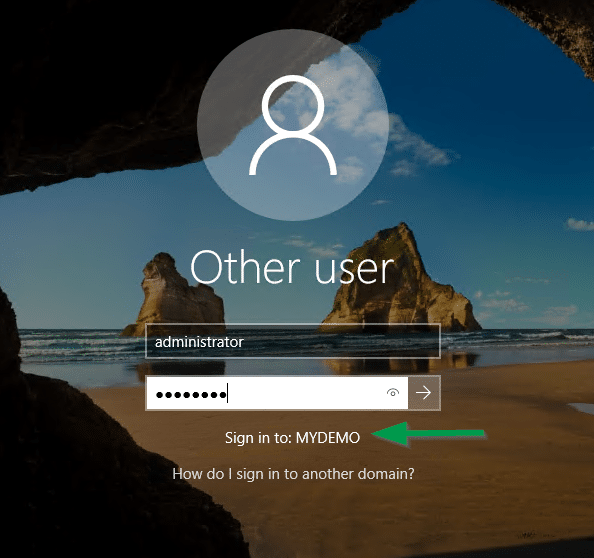
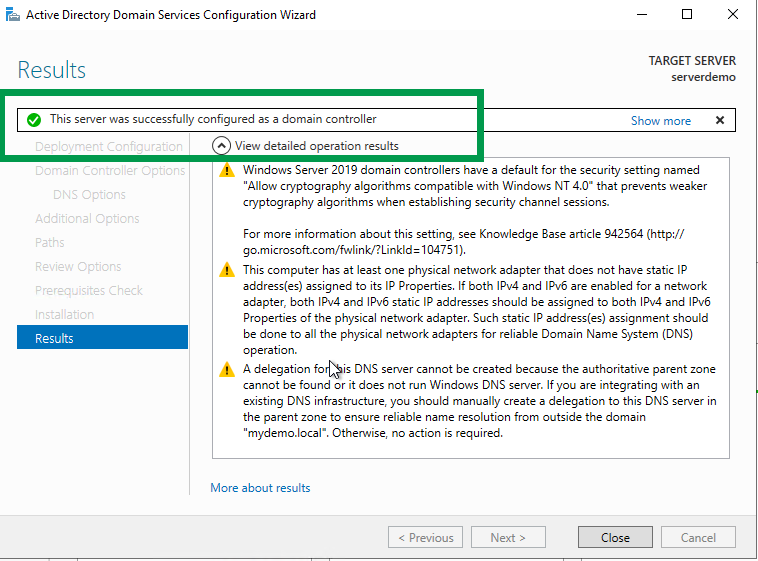
Once the roles installation is complete, the server will automatically reboot and you will see the NEW domain login screen.
Install and Configure Reverse DNS Lookup Zone
Now that the Active Directory Services Domain controller is installed, DHCP services are installed let’s create the Reverse DNS lookup zone for the IPv4 IP subnet we plan to use for this network and domain. A reverse DNS lookup zone helps with name resolution for IP address to an A record hostname. Some applications and services will attempt DNS lookups based on the IP address first.
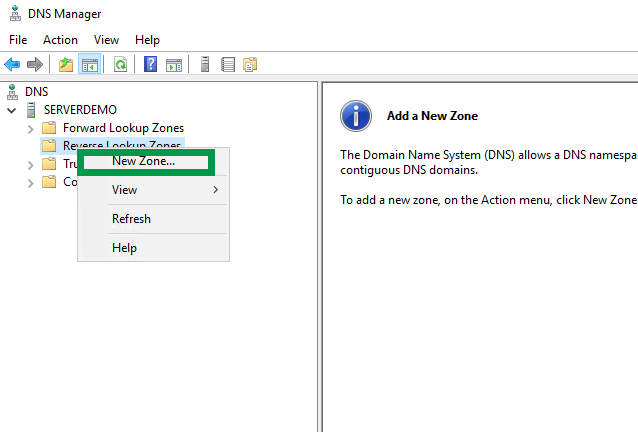
Launch the DNS Manager tool from “Windows Administrative Tools” > expand your server > right click on “Reverse Lookup Zones” and select “New Zone“. Click Next at the welcome screen.
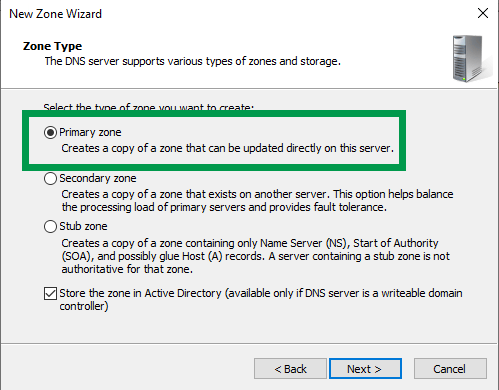
At the “Zone Type” screen leave the default option selected and click Next.
Click Next at the AD Replicate Scope screen and select the “To all DNS servers running on domain controllers in this domain…“.
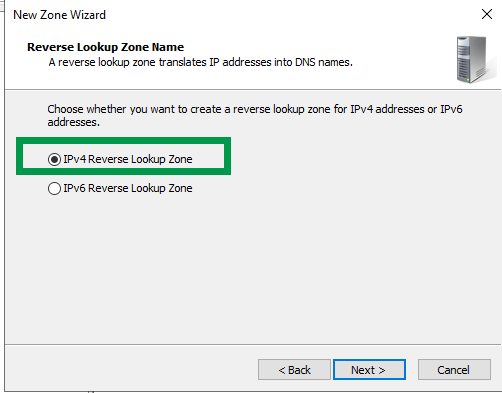
Select “IPv4 Reverse Lookup Zone” and click Next.
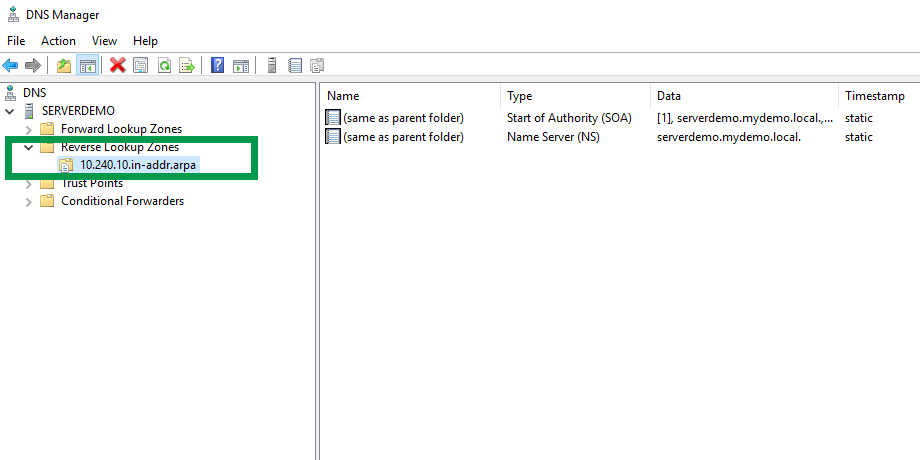
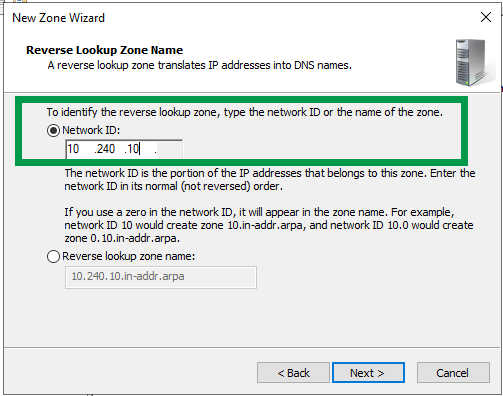
Reverse Lookup Zone name Network ID should be your environments subnet network. In my case it’s 10.240.10.
At the Dynamic Update screen click Next, click Finish to complete the wizard. The new Reverse DNS Lookup zone will be listed and clients will register their IP addresses automatically in this zone.
Enable and Set DNS Scavenging
Perform the following steps within DNS Manager to enable DNS.
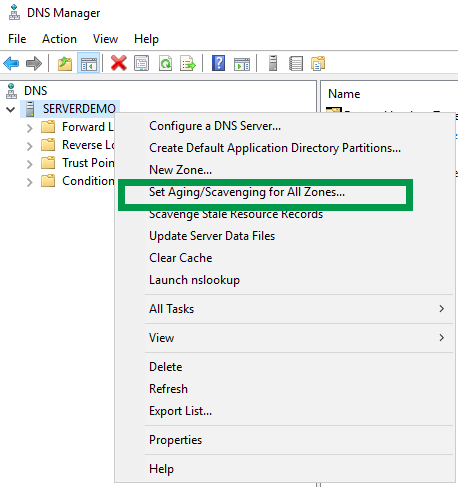
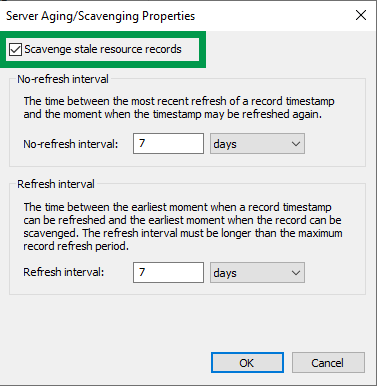
Launch DNS Manager, right-click on your DNS server, select “Set Aging/Scavenging for All Zones“. Check the box “Scavenge stale resource records” and click Ok to save the changes.
Configure DHCP Server Options and Authorize Server
The final step that needs to be performed is authorizing the DHCP server and creating / enabling the DHCP client scope.
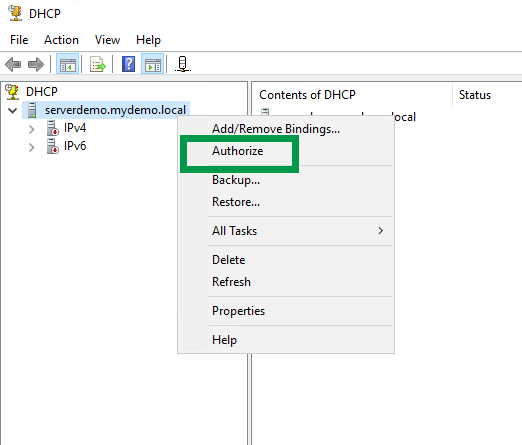
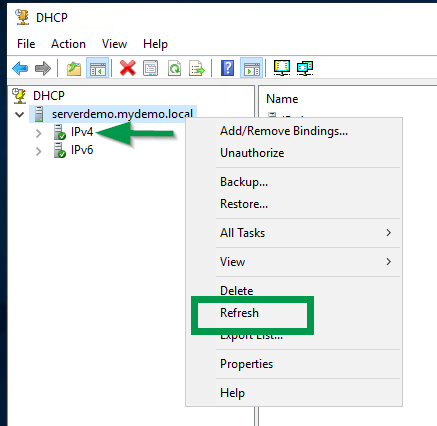
Launch DHCP Manager from the start menu > Windows Administrative Tools. Exp[and your DHCP server, right-click on the server name and select “Authorize“. Right-click on the server again and select “Refresh”. You should see all green check boxes now.
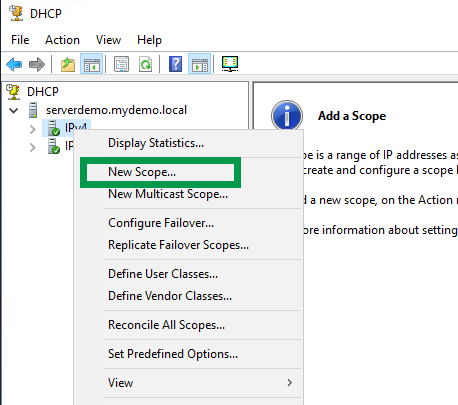
Finally, we can create the DHCP client scope. Right-click on “IPv4” option, select New Scope, click Next at the welcome screen, provide a name for the DHCP scope and click Next.
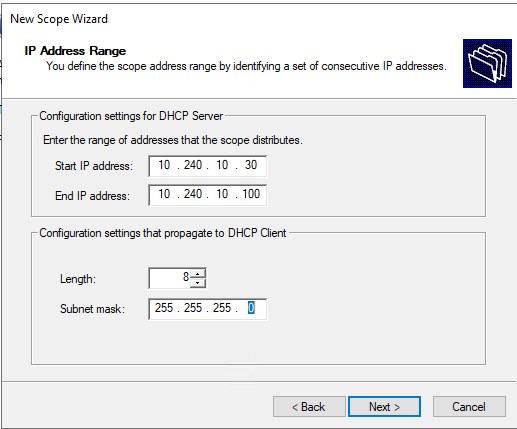
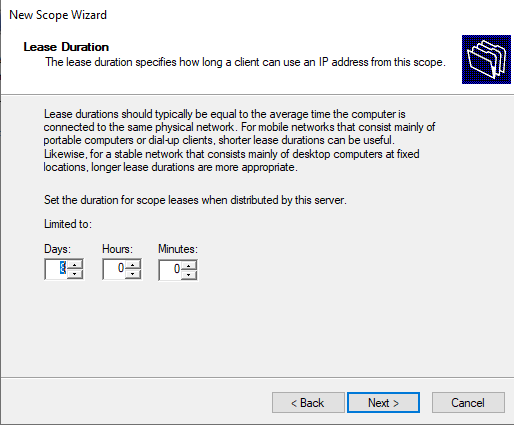
Enter the DHCP IP address range using the applicable IP subnet details you have decided to use. Click Next at the Exclusion and Delay screen, select the default 8 days for lease duration and click Next.
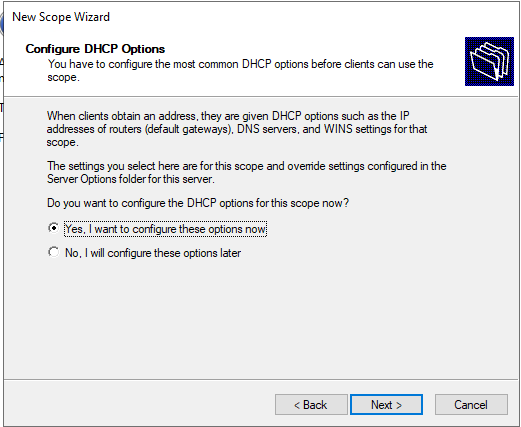
Click Yes I want to configure these options now on the DHCP options screen.
Click Next through the remaining DHCP scope screens to activate the DHCP client scope.
Congratulations! The AD domain controller is finished, a DNS reverse DNS zone exist and you have a DHCP client scope.
To test, create a client VM for Windows 10 and ensure the network card is using the “INTERNAL” LAN connection and manually add the PC to the new AD domain.

